In the previous article you learnt to consume a Web API created in ASP.NET Core using jQuery client. Although local clients are quite common in Ajax rich applications, many real-world situations require that you call a Web API from a different application. Thus the client application and the Web API application are different and you can't use JavaScript to call the Web API (due to default browser settings). Moreover, if you wish to call a Web API from a desktop application JavaScript is not an option. In such cases you can use HttpClient to call the Web API. This article tells you how.
I assume that you have the Web API we developed in the earlier parts of this series ready with you. Add a new ASP.NET Core project to the same solution and configure it to use ASP.NET Core MVC. We won't go into the details of that configuration here since that's the basic step for creating any web application under ASP.NET Core.
Once you have the new project configured, open Project.json and add the two dependencies:
"System.Net.Http": "4.3.0-preview1-24530-04",
"Newtonsoft.Json": "9.0.2-beta1"
Notice the System.Net.Http entry. This is a NuGet package that supplies us the HttpClient component. The Json.Net component comes from the Newtonsoft.Json NuGet package and does the trick of JSON serialization and deserialization for us.
Now add a new controller - HomeController - to the project (remember now you are coding in the client application's project, not the Web API project). The HomeController will have seven actions as outlined below:
- Index() : Returns a view displaying a list of existing customers.
- Insert() and Insert(obj) : Handle the insert operation by adding a new customer.
- Update(id) and Update(obj) : Handle the update operation by modifying an existing customer.
- ConfirmDelete() and Delete() : Handle delete confirmation and delete operations by removing a customer.
In the section that follow I won't discuss the views and their markup in detail. They are quite straightforward and similar to ASP.NET MVC views. Our main interest is the actions that make use of HttpClient component to call the Web API.
Displaying a list of customers
The Index view that displays a list of all the customers looks like this:
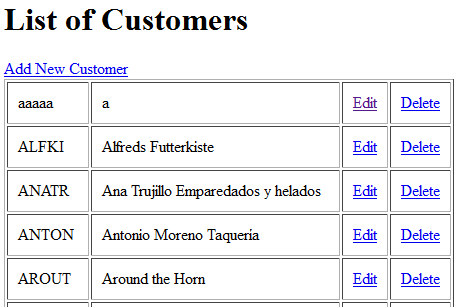
The Index() action behind this view is shown below:
public ActionResult Index()
{
    using (HttpClient client = new HttpClient())
    {
        client.BaseAddress = new Uri
("http://localhost:49387");
        MediaTypeWithQualityHeaderValue contentType =
new MediaTypeWithQualityHeaderValue("application/json");
        client.DefaultRequestHeaders.Accept.Add(contentType);
        HttpResponseMessage response = client.GetAsync
("/api/customerservice").Result;
        string stringData = response.Content.
ReadAsStringAsync().Result;
        List<Customer> data = JsonConvert.DeserializeObject
<List<Customer>>(stringData);
        return View(data);
    }
}
The Index() action creates a new instance of HttpClient and sets its BaseAddress and accept header accordingly. Make sure to change the base address as per your setup. The code then calls the GetAsync() method of HttpClient to invoke the Get() action of the Web API. Since the content type is set to JSON, the Web API will its data in JSON format. This data is unpacked from the HttpResponseMessage object using the ReadAsStringAsync() method. The JSON string is then deserialized into a List of Customer objects using Json.Net component's JsonConvert class.
Adding a new customer
The Insert view that allows you to add a new customer is shown below:
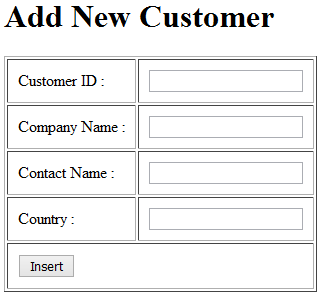
The GET and POST versions of the Insert() action are shown below:
public ActionResult Insert()
{
return View();
}
[HttpPost]
public ActionResult Insert(Customer obj)
{
....
string stringData = JsonConvert.
SerializeObject(obj);
var contentData = new StringContent
(stringData, System.Text.Encoding.UTF8,
"application/json");
HttpResponseMessage response = client.PostAsync
("/api/customerservice", contentData).Result;
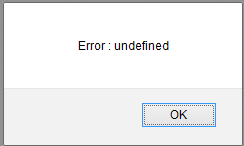
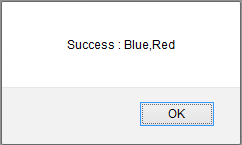
ViewBag.Message = response.Content.
ReadAsStringAsync().Result;
return View(obj);
....
}The GET version of Insert() simply returns the Insert view to the browser.
The POST version of Insert() first serializes the Customer object received through the model binding into a JSON string. This is necessary because we want to POST data in JSON format. The code then wraps this JSON string into a StringContent object. Notice that the StringContent constructor sets the encoding to UTF8 and media type to JSON. The code then calls the PostAsync() method of HttpClient and submits the JSON data to the Web API using POST verb. The string message returned by the Web API is unwrapped from HttpResponseMessage object using its ReadAsStringAsync() method.
Modify a customer
The Update view looks like this:
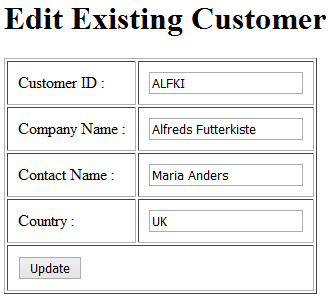
And the two Update() actions responsible for the relevant functionality are as shown below:
public ActionResult Update(string id)
{
    HttpResponseMessage response =
client.GetAsync("/api/customerservice/" + id).Result;
    string stringData = response.Content.
ReadAsStringAsync().Result;
    Customer data = JsonConvert.
DeserializeObject<Customer>(stringData);
    return View(data);
}

[HttpPost]
public ActionResult Update(Customer obj)
{
    string stringData = JsonConvert.SerializeObject(obj);
    var contentData = new StringContent(stringData,
System.Text.Encoding.UTF8,"application/json");
    HttpResponseMessage response = client.PutAsync
("/api/customerservice/" + obj.CustomerID,
contentData).Result;
    ViewBag.Message = response.Content.
ReadAsStringAsync().Result;
    return View(obj);
}
The GET version of Update() action invokes Get(id) of Web API using the GetAsync() method of HttpClient. Notice that this time CustomerID is appended in the URL. The returned Customer object is unpacked using the ReadAsStringAsync() method and the stringified JSON is collected in a string variable. This JSON string is then deserialized into a Customer object using Deserialize() method if JsonConvert.
The POST version of Update() is quite similar to the POST version of Insert() we discussed earlier. However, this time we use PutAsync() method by passing the CustoemrID and the stringified JSON data. The string message is then read using ReadAsStringAsync() as before.
Deleting a customer
Clicking the Delete links from the Index view takes you to a confirmation page as shown below:
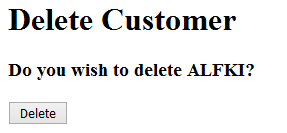
The ConfirmDelete() action behind this view is shown below:
public ActionResult ConfirmDelete(string id)
{
    HttpResponseMessage response =
client.GetAsync("/api/customerservice/" + id).Result;
    string stringData = response.
Content.ReadAsStringAsync().Result;
    Customer data = JsonConvert.
DeserializeObject<Customer>(stringData);
    return View(data);
}
This action is same as the GET version of Update() action.
When you click on the Delete button to delete the selected customer, the page is POSTed to Delete() action:
[HttpPost]
public ActionResult Delete(string customerid)
{
    HttpResponseMessage response =
client.DeleteAsync("/api/customerservice/"
+ customerid).Result;
    TempData["Message"] =
response.Content.ReadAsStringAsync().Result;
    return RedirectToAction("Index");
}
The Delete() action receives the CustomerID through model binding. Remember to emit this value on the ConfirmDelete view using a hidden field (or any other technique of your choice). The code then calls the DeleteAsync() method if the HttpClient to invoke the Delete() action of Web API. The string message returned from the Web API is stored in a TempData entry so that it can be outputted on the Index view.
That's it! This complete the remote client for the Web API. Run the Index view and test all the CRUD operations.