top button
Flag Notify
    Connect to us
      Site Registration

Site Registration

Four Ways Of Handling Multiple Submit Buttons In ASP.NET MVC

+4 votes
427 views

A common beginner question is - How to handle multiple submit buttons in ASP.NET MVC?

In web forms this is quite straightforward because all you need to do is write the Click event handler of the respective buttons. However, in ASP.NET MVC you need to rely on the plain HTML and / or  JavaScript to deal with the situation. To that end this article illustrates four ways of handling multiple submit buttons.

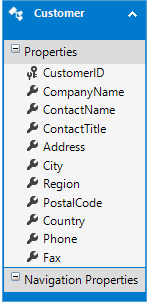
The following code uses a simple Customer model class that looks like this:

public class Customer
{
    public string CustomerID { get; set; }
    public string CompanyName { get; set; }
    public string ContactName { get; set; }
    public string Country { get; set; }
}

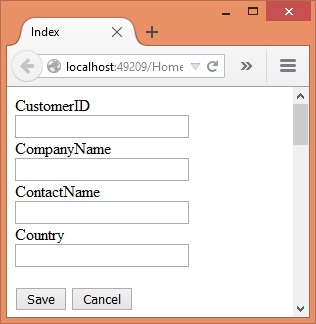
The Index view accepts values for all the properties of the Customer classly CustomerID, CompanyName, ContactName and Country.

1. Multiple buttons with different names

In this technique you use BeginForm() helper as usual and submit a form to an action method. The relevant markup from the Index view that does this is shown below:

@model MultipleSubmitButtons.Models.Customer
...
...
@using (Html.BeginForm("ProcessForm", "Home", FormMethod.Post))
{
    @Html.EditorForModel()
    <br />
    <input type="submit" name="save" value="Save" />
    <input type="submit" name="cancel" value="Cancel" />
}

As you can see the BeginForm() helper specifies the action name to be ProcessForm, controller name to be Home and the form method to be POST. To display a data entry textboxes EditorForModel() helper is used. You can very well use helpers such as TextBoxFor() and LabelFor() if you so wish.

There are two submit buttons - one with name attribute set to save and the other with name of cancel. When you click a particular button, its name and value is sent to the server. The ProcessForm() action needs to grab these values to detect which one was clicked.

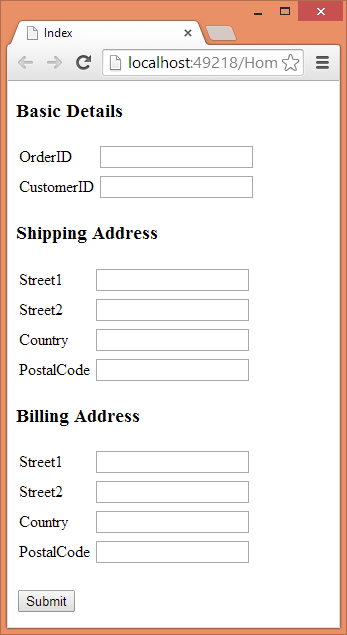
This is how the Index view looks like in the browser:

image

Th ProcessForm() action that does this detection is shown below:

[HttpPost]
public ActionResult ProcessForm(Customer obj,
                   string save,string cancel)
{
    if(!string.IsNullOrEmpty(save))
    {
        ViewBag.Message = "Customer saved successfully!";
    }
    if (!string.IsNullOrEmpty(cancel))
    {
        ViewBag.Message = "The operation was cancelled!";
    }
    return View("Result",obj);
}

Notice that the ProcessForm() action receives three parameters through model binding. The first parameter is the Customer object that holds the values entered in the textboxes. The save and cancel string parameters hold the value of the respective buttons. These parameter names must match the names of the butttons on the form. If a button is clicked, its value is received in the action. Otherwise its value will be null. For example, if you click on the Save button the save parameter will hold Save and the cancel parameter will hold null.

The if blocks then check the value of save and cancel parameters and accordingly set a ViewBag property. The ProcessForm() action returns Result view. The markup of Result view is shown below:

@model MultipleSubmitButtons.Models.Customer
...
<body>
    <h1>@ViewBag.Message</h1>
    @Html.DisplayForModel()
</body>
</html>

The Result view simply displays the Message property from the ViewBag and also displays the value held in the Customer object.

2. Multiple buttons with the same name

This technique is similar to the previous technique. But the buttons involved are given the same name in the HTML markup.

@using (Html.BeginForm("ProcessForm", "Home", FormMethod.Post))
{
    @Html.EditorForModel()
    <br />
    <input type="submit" name="submit" value="Save" />
    <input type="submit" name="submit" value="Cancel" />
}

Notice that the name attribute of both the buttons is set to submit and their value attribute is set to some string.

Then the ProcessForm action accepts a single parameter - submit - that receives the value of the button clicked by the user. This is shown below:

[HttpPost]
public ActionResult ProcessForm(Customer obj, string submit)
{
    switch(submit)
    {
        case "Save":
            ViewBag.Message = "Customer saved successfully!";
            break;
        case "Cancel":
            ViewBag.Message = "The operation was cancelled!";
            break;
    }
    return View("Result", obj);
}

As you can see the submit parameter is checked for its value. If you click the Save button, submit parameter will be Save. If you click on Cancel button the submit parameter will have alue of Cancel. The switch statement then checks the values and does some processing specific to a button.

3. HTML5 formaction and formmethod attributes

In this technique you use the formaction and formmethod attributes introduced in HTML5. These attributes can be set on the buttons under consideration. The formaction attribute indicates the form's action whereas the formpost attribute indicates the form submition method.

The modified form markup is shown below:

@using (Html.BeginForm())
{
    @Html.EditorForModel()
    <br />
    <input type="submit" name="save" value="Save" 
              formaction="SaveForm" formmethod="post" />
    <input type="submit" name="cancel" value="Cancel" 
              formaction="CancelForm" formmethod="post" />
}

As you can see the formaction attribute of the save button submits to SaveForm() action whereas the cancel button submits to the CancelForm() action. The formmethod attribute is set to post for both the buttons.

The SaveForm() and CancelForm() actions are shown below:

[HttpPost]
public ActionResult SaveForm(Customer obj)
{
    ViewBag.Message = "Customer saved successfully!";
    return View("Result", obj);
}

[HttpPost]
public ActionResult CancelForm(Customer obj)
{
    ViewBag.Message = "The operation was cancelled!";
    return View("Result", obj);
}

The SaveForm() needs to accept only the Customer model object because this is exclusively called by the save button. Similarly the CancelForm() action needs to receive only the model object since it is invoked exclusively by the cancel button. 

4. jQuery / JavaScript code

If above techniques doesn't meet your requirements you can always use jQuery or JavaScript to programatically set the form action. The following markup shows how the modified form looks like:

@using (Html.BeginForm())
{
    @Html.EditorForModel()
    <br />
    <input type="submit" id="save" value="Save" />
    <input type="submit" id="cancel" value="Cancel" />
}

This time the ID attribute of the buttons is set to save and cancel respectively. This way you can easily access them in the jQuery code. The jQuery code that wires the click event handlers for these buttons and sets the form action dynamically is shown below:

$(document).ready(function () {

    $("#save").click(function () {
        $("form").attr("action", "/home/saveform");
    });

    $("#cancel").click(function () {
        $("form").attr("action", "/home/cancelform");
    });

});

The click event handler of the save button sets the action attribute of the form to /home/saveform. This is done using the attr() method of jQuery. On the same lines the click event handler of the cancel button sets the action to /home/cancelform.

Which technique to use?

All the techniques discussed above are standard ways of dealing with multiple submit buttons. So, the selection depends on developers choice and application requirements. If your logic is such that a single action is doing multiple things then technique #1 comes handy. An example of this technique can be seenhere that develops a wizard with next and previous buttons. The second technique has a drawback that if you change the value attribute then you need to adjust the switch statement accordingly. Moreover, it may pose a problem in multilingual websites since you are checking the value displayed on the buttons. So, this technique should be avoided if you anticipate the button texts to change. If the target browser supports HTML5 (all the leading browsers support these attributes) then using formaction and formmethod attributes is recommended. This way you get a cleaner separatation of the concerns and the code is more readable. If the form or the buttons themselves are being generated on-the-fly then jQuery technique is handy because things are changing dynamically.

posted Oct 14, 2016 by Shivaranjini

  Promote This Article
Facebook Share Button Twitter Share Button LinkedIn Share Button


Related Articles

ASP.NET model binding is quite powerful and flexible. It caters to most of the scenarios without much configuration from developers. However, at times you may need to intervene in order to achieve the desired model binding effect. One such situation is when you use multiple instance of a partial view on a view. This article shows one possible approach to deal with such situations.

Suppose that you have a web page as shown below:

image

As shown in the above figure the web page captures OrderID, CustomerID, ShippingAddress and BillingAddress from the end user. This information is stored in a model class - Order - that looks like this:

public class Order
{
    public int OrderID { get; set; }
    public int CustomerID { get; set; }

    public Address ShippingAddress { get; set; }
    public Address BillingAddress { get; set; }
}

public class Address
{
    public string Street1{get;set;}
    public string Street2{get;set;}
    public string Country{get;set;}
    public string PostalCode{get;set;}
}

The Order class consists of four public properties namely OrderID, CustomerID, ShippingAddress and BillingAddress. Notice that OrderID and CustomerID are integer properties whereas ShippingAddress and BillingAddress properties are of type Address. The Address class is also shown and consists of four string properties - Street1, Street2, Country and PostalCode.

Now let's assume that the whole page is rendered using two ASP.NET MVC Partial Pages. The OrderID and CustomerID is captured using _BasicDetails.cshtml as shown below:

@model Demo.Models.Order

<table>
    <tr>
        <td>@Html.LabelFor(m=>m.OrderID)</td>
        <td>@Html.TextBoxFor(m=>m.OrderID)</td>
    </tr>
    <tr>
        <td>@Html.LabelFor(m=>m.CustomerID)</td>
        <td>@Html.TextBoxFor(m=>m.CustomerID)</td>
    </tr>
</table>

Note that _BasicDetails partial page has its model set to Order class. The partial page then uses LabelFor() and TextBoxFor() helpers to display a label and textbox for the OrderID and CustomerID model properties respectively.

The address information is captured using _Address.cshtml as shown below:

@model Demo.Models.Address

<table>
    <tr>
        <td>@Html.LabelFor(m=>m.Street1)</td>
        <td>@Html.TextBoxFor(m=>m.Street1)</td>
    </tr>
    <tr>
        <td>@Html.LabelFor(m=>m.Street2)</td>
        <td>@Html.TextBoxFor(m=>m.Street2)</td>
    </tr>
    <tr>
        <td>@Html.LabelFor(m=>m.Country)</td>
        <td>@Html.TextBoxFor(m=>m.Country)</td>
    </tr>
    <tr>
        <td>@Html.LabelFor(m=>m.PostalCode)</td>
        <td>@Html.TextBoxFor(m=>m.PostalCode)</td>
    </tr>
</table>

The _Address partial page has Address class as its model and uses LabelFor() and TextBoxFor() helpers to display model properties.

The Index view that makes use of _BasicDetails and _Address partial pages to form the complete page is shown below:

@model Demo.Models.Order

...
@using(Html.BeginForm("ProcessForm","Home",FormMethod.Post))
{
  <h3>Basic Details</h3>
  @Html.Partial("_BasicDetails")

  <h3>Shipping Address</h3>
  @Html.Partial("_Address",Model.ShippingAddress)
        
  <h3>Billing Address</h3>
  @Html.Partial("_Address",Model.BillingAddress)
        
  <input type="submit" value="Submit" />
}
</body>
</html>

The Index view renders the _BasicDetails partial page using Partial() helper. Since the model for Index view is Order class, the same is available to the _BasicDetails partial page. Then two instances of _Address partial page are rendered on the page to capture ShippingAddress and BillingAddress respectively. Recollect that _Address has Address class as its model. So, Model.ShippingAddress and Model.BillingAddress are passed to the Partial() helper.

The above form submits to ProcessForm action method that looks like this:

public ActionResult ProcessForm(Order ord)
{
    //do something with Order object here
    return View("Index");
}

And the Index() action method looks like this:

public ActionResult Index()
{
    Order ord = new Order();
    ord.BillingAddress = new Address();
    ord.ShippingAddress = new Address();
    return View(ord);
}

Both of these methods are quite straightforward and need no explanation.

Now comes the important and tricky part. If you run the application at this stage, you will get the following HTML markup in the browser (unwanted markup has been removed for the sake of clarity):

<form action="/Home/ProcessForm" method="post">        
<h3>Basic Details</h3>
<table>
    <tr>
        <td><label for="OrderID">OrderID</label></td>
        <td><input id="OrderID" name="OrderID" type="text" /></td>
    </tr>
    <tr>
        <td><label for="CustomerID">CustomerID</label></td>
        <td><input id="CustomerID" name="CustomerID" type="text" /></td>
    </tr>
</table>
<h3>Shipping Address</h3>
<table>
    <tr>
        <td><label for="Street1">Street1</label></td>
        <td><input id="Street1" name="Street1" type="text" value="" /></td>
    </tr>
    <tr>
        <td><label for="Street2">Street2</label></td>
        <td><input id="Street2" name="Street2" type="text" value="" /></td>
    </tr>
    <tr>
        <td><label for="Country">Country</label></td>
        <td><input id="Country" name="Country" type="text" value="" /></td>
    </tr>
    <tr>
        <td><label for="PostalCode">PostalCode</label></td>
        <td><input id="PostalCode" name="PostalCode" type="text" value="" /></td>
    </tr>
</table>
<h3>Billing Address</h3>
<table>
    <tr>
        <td><label for="Street1">Street1</label></td>
        <td><input id="Street1" name="Street1" type="text" value="" /></td>
    </tr>
    <tr>
        <td><label for="Street2">Street2</label></td>
        <td><input id="Street2" name="Street2" type="text" value="" /></td>
    </tr>
    <tr>
        <td><label for="Country">Country</label></td>
        <td><input id="Country" name="Country" type="text" value="" /></td>
    </tr>
    <tr>
        <td><label for="PostalCode">PostalCode</label></td>
        <td><input id="PostalCode" name="PostalCode" type="text" value="" /></td>
    </tr>
</table>
<input type="submit" value="Submit" />
</form>

Notice the markup in bold letters. Can you see HTML elements with duplicate id and name attributes? That's because you are rendering two instance of the _Address partial page. The model binding framework requires that the HTML fields follow this naming convention for the model binding to work as expected:

<input id="ShippingAddress_Street1" 
       name="ShippingAddress.Street1" type="text" value="" />
<input id="BillingAddress_Street1" 
       name="BillingAddress.Street1" type="text" value="" />

As you can see from the above markup the id and name attributes must fully quality the model property being bound. In the absence of such a naming pattern the Order instance won't be bound as expected as confirmed by the following figure:

image

As shown above the ShippingAddress and BillingAddress properties are null whereas OrderID and CustomerID are captured successfully.

The above problem can be solved by using a variation of the Partial() helper while rendering the _Address partial page. The following code shows how this is done:

<h3>Basic Details</h3>
@Html.Partial("_BasicDetails")

<h3>Shipping Address</h3>
@Html.Partial("_Address", 
  new ViewDataDictionary() 
  { 
    TemplateInfo = new TemplateInfo() 
      { HtmlFieldPrefix = "ShippingAddress" } })

<h3>Billing Address</h3>
@Html.Partial("_Address", 
  new ViewDataDictionary() 
    { TemplateInfo = new TemplateInfo() 
      { HtmlFieldPrefix = "BillingAddress" } })

The variation of Partial() helper used above uses ViewDataDictionary parameter to specify TemplateInfo. The HtmlFieldPrefix property of the TemplateInfo is set to ShippingAddress for the first instance and to the BillingAddress for the second instance.

If you run the application now, you will find the following markup in the browser:

<form action="/Home/ProcessForm" method="post">
<h3>Basic Details</h3>
<table>
    <tr>
        <td><label for="OrderID">OrderID</label></td>
        <td><input id="OrderID" name="OrderID" type="text" value="0" /></td>
    </tr>
    <tr>
        <td><label for="CustomerID">CustomerID</label></td>
        <td><input id="CustomerID" name="CustomerID" type="text" value="0" /></td>
    </tr>
</table>
<h3>Shipping Address</h3>
<table>
    <tr>
        <td><label for="ShippingAddress_Street1">Street1</label></td>
        <td><input id="ShippingAddress_Street1" 
                   name="ShippingAddress.Street1" type="text" value="" /></td>
    </tr>
    <tr>
        <td><label for="ShippingAddress_Street2">Street2</label></td>
        <td><input id="ShippingAddress_Street2" 
                   name="ShippingAddress.Street2" type="text" value="" /></td>
    </tr>
    <tr>
        <td><label for="ShippingAddress_Country">Country</label></td>
        <td><input id="ShippingAddress_Country" 
                   name="ShippingAddress.Country" type="text" value="" /></td>
    </tr>
    <tr>
        <td><label for="ShippingAddress_PostalCode">PostalCode</label></td>
        <td><input id="ShippingAddress_PostalCode" 
                   name="ShippingAddress.PostalCode" type="text" value="" /></td>
    </tr>
</table>
<h3>Billing Address</h3>
<table>
    <tr>
        <td><label for="BillingAddress_Street1">Street1</label></td>
        <td><input id="BillingAddress_Street1" 
                   name="BillingAddress.Street1" type="text" value="" /></td>
    </tr>
    <tr>
        <td><label for="BillingAddress_Street2">Street2</label></td>
        <td><input id="BillingAddress_Street2" 
                   name="BillingAddress.Street2" type="text" value="" /></td>
    </tr>
    <tr>
        <td><label for="BillingAddress_Country">Country</label></td>
        <td><input id="BillingAddress_Country" 
                   name="BillingAddress.Country" type="text" value="" /></td>
    </tr>
    <tr>
        <td><label for="BillingAddress_PostalCode">PostalCode</label></td>
        <td><input id="BillingAddress_PostalCode" 
                   name="BillingAddress.PostalCode" type="text" value="" /></td>
    </tr>
</table>
<input type="submit" value="Submit" />
</form>

As expected the id and name attributes are now fully qualified and hence the model binding will happen as expected as shown below:

image

The model binding now correctly captures ShippingAddress as well as BillingAddress information.

READ MORE

Developers new to ASP.NET MVC often ask these questions:

  • How do I pass multiple models to a view?
  • How do I pass anonymous objects to a view?

This article provides a solution to both of these questions. Before we discuss the solution, let's quickly understand these questions and possible solutions in brief.

How do I pass multiple models to a view?

Consider a case where you have two model classes - Customer and Order. ASP.NET MVC allows you to pass only ONE model to a view. You typically do that by passing the model as a View() method parameter. This means a view can be bound with one and only one model. So, in the preceding example a view can either display Customer data or Order data. What if a view requires to display both? You can tackle such a situation as follows:

  • Create a new view model class, say CustomerOrder, that has two properties. One for holding Customer data and other for holding Order data. 
    public class CustomerOrder
    {
      public List<Customer> Customers{get; set;}
      public List<Order> Orders{get; set;}
    }
  • Pass one of the model as the View() method parameter and other(s) through ViewData or ViewBag.
  • Use ExpandoObject to create a dynamic model.

The first two approaches are quite straightforward and hence I won't discuss them here. Out of these three the first solution (custom view model class) is a recommended approach to deal with the situation. However, it calls for creating of a new view model class (POCO). The second one does the job but the view can't be strongly typed because models passed through ViewData or ViewBag are not part of the Model property of the view. The third approach is the topic of this article and is discussed in detail in the later part of this article.

 How do I pass anonymous objects to a view?

Sometimes you need to write LINQ to Entities queries that return data filled in an anonymous type. Consider the following example:

var query = from c in db.Customers
            join o in db.Orders
            on c.CustomerID equals o.CustomerID
            orderby c.CustomerID ascending
            select new { 
                c.CustomerID,
                c.CompanyName,
                o.OrderID,
                o.OrderDate 
            };

Here, you are not selecting Customer objects (select c). You are creating an anonymous type that has four properties - CustomerID, CompanyName, OrderID and OrderDate. Although this LINQ query works without any problem, the problem is you can't pass anonymous types to an ASP.NET MVC view. If you try to do so, you will see a runtime error. Of course, just like previous case you can create a new view model (POCO with these four properties) and project your data in it. You can then pass the collection to the View() method. As before this is a recommended solution but again you need create an additional class. If you wish to avoid doing that for some reason, here also you can resort to ExpandoObject. You can store the realized data in an ExpandoObject and then pass it to the view.

ExpandoObject to the rescue

The ExpandoObject class resides in System.Dynamic namespace and represents an object whose members can be dynamically added and removed at run time. In our specific cases an ExpandoObject can act as a container for multiple pieces of data that you wish to pass as a model to a view. So, in a way ExpandoObject is a "dynamic" alternative to a manually created view model.

Storing data in an ExpandoObject is straightforward.

dynamic model = new ExpandoObject();
model.Customers = <some_data_here>;
model.Orders = <some_data_here>;

The above code creates an instance of ExpandoObject class. Notice that the instance is stored in a variable of type dynamic. The code then assigns Customers and Orders properties of the ExpandoObject to some data. You should be familiar with this usage because ViewBag uses the same "dynamic" mechanism to store values.

Ok. Now that you know what an ExpandoObject is and how to use it, let's put it to use in our specific situations.

Let's assume that you have two model classes - Customers and Orders - as a part of Entity Framework data model. You wish to pass both of them to a view. So, you can write something like this in an action method:

public ActionResult Index()
{
    NorthwindEntities db=new NorthwindEntities();

    dynamic model = new ExpandoObject();
    model.Customers = db.Customers.ToList();
    model.Orders = db.Orders.ToList();
    return View(model);
}

Notice the code marked in bold letters. The code creates an ExpandoObject and assigns two properties on it - Customers and Orders. These properties store a generic List of the respective model objects. The ExpandoObject is then passed to the View() method.

You can use  the ExpandoObject in the view as shown below:

@model dynamic

...
<h1>List of Customers</h1>
<div>
  @foreach(var item in Model.Customers)
  {
    <h2>@item.CustomerID</h2>
  }
</div>

Notice that the view is marked to use a dynamic model using the @model dynamic line. This line is optional. If you don't write any @model then Razor defaults to dynamic. The foreach loop then iterates through Model.Customers property and displays all the CustomerIDs. Note that since Model points to an ExpandoObject, you won't get any IntelliSense help for the property names. You will need to key them in yourself. On the same lines you can display Model.Orders data.

Store anonymous objects in an ExpandoObject

In the preceding example you stored List of Customer and Order objects respectively in the model ExpandoObject. Now let's see how to store an anonymous object in an ExpandoObject.

var addtionalInfo = new { 
                    CustomersNote="This is a customer note",
                    OrdersNote="This is an order note" };
IDictionary<string, object> 
expandoAddInfo = new ExpandoObject();
foreach (PropertyDescriptor property 
         in 
         TypeDescriptor.GetProperties(addtionalInfo.GetType()))
{
    expandoAddInfo.Add(property.Name, 
           property.GetValue(addtionalInfo));
}
model.AdditionalInfo = expandoAddInfo;

The code creates an anonymous object with two properties - CustomersNote and OrdersNote - and stores it in additionalInfo variable. Then an ExpandoObject is created. This time, however, it is captured as an IDictionary<string, object>. Then a foreach loop iterates through all the properties of additionalInfo object. This is done using PropertyDescriptor and TypeDescriptor classes from System.ComponentModel namespace. These classes allow you to reflect upon the properties of any object (additionalInfo in this case). All the properties from the anonymous object are transferred to the ExpandoObject by adding them to the expandoAddInfo variable. Finally, AdditionalInfo property of model (which itself is an ExpandoObject) is set to expandoAddInfo ExpandoObject.

You can pass the model object to the view exactly as before. Once received in the view you can access the AdditionalInfo property as shown below:

<h1>Additional Information</h1>
<h2>@Model.AdditionalInfo.CustomersNote</h2>
<h2>@Model.AdditionalInfo.OrdersNote</h2>

What if you wish to convert a collection of anonymous objects to an ExpandoObject? The following code shows how this can be done:

var query = from c in db.Customers
            join o in db.Orders
            on c.CustomerID equals o.CustomerID
            orderby c.CustomerID ascending
            select new { 
                c.CustomerID,
                c.CompanyName,
                o.OrderID,
                o.OrderDate 
            };

List<ExpandoObject> joinData=new List<ExpandoObject>();

foreach(var item in query)
{
    IDictionary<string, object> itemExpando = new ExpandoObject();
    foreach (PropertyDescriptor property 
             in 
             TypeDescriptor.GetProperties(item.GetType()))
    {
        itemExpando.Add(property.Name, property.GetValue(item));
    }
    joinData.Add(itemExpando as ExpandoObject);
}

model.JoinData = joinData;

The above code is similar to the previous case but deals with a List of ExpandoObject (joinData variable). Each ExpandoObject (itemExpando variable) holds data belonging to a single anonymous object. The joinData List is then assigned to the JoinData property of the model ExpandoObject.

You can access JoinData inside a view as shown below:

<h1>Customer Orders Join Data</h1>
<div>
    @foreach (var item in Model.JoinData)
    {
        <h2>@item.CustomerID (@item.OrderID on @item.OrderDate)</h2>
    }
</div>

A note of caution about using ExpandoObject as shown above - Although ExpandoObject solves our problem, one should carefully evaluate whether there is any flaw in the model creation process. You should give a thought to creating POCOs for holding the multiple pieces instead of using an ExpandoObject. Since ExpandoObject instances are dynamic Visual Studio IntelliSense won't help much. POCO containers, on the other hand, give all the benefits of strongly typed view.

That's it for today! Keep coding!!

READ MORE

Most of the times the ASP.NET MVC routes consists of known number of segments. For example, consider the default route pattern defined by ASP.NET MVC:

routes.MapRoute(
    name: "Default",
    url: "{controller}/{action}/{id}",
    defaults: new { controller = "Home", 
              action = "Index", 
              id = UrlParameter.Optional }
);

Here, the route consists of three segments namely controller, action and an optional id. This works well for many applications. However, at times you may not have idea about the exact number of route segments involved. Consider the following example.

Suppose you are building an application that shows the population in one or more cities of a country. So, you need to pass the country name and one or more cities as a part of the URLs. Some sample URLs are given below:

/home/getdata/USA/Chicago
/home/getdata/USA/Chicago/Houston
/home/getdata/USA/Seattle/Boston/Tampa

As you can see from the above URLs, one could specify any number of cities in the route segments. Obviously you can't have a route pattern with a known number of segments. Luckily, ASP.NET MVC allows you to use what is often called catch-all route parameter. Let's see how it can be used in this situation.

Create a new ASP.NET MVC application and open its RouteConfig.cs file. Then add the following MapRoute() call after the default route pattern.

routes.MapRoute(
    name: "CatchAll",
    url: "{controller}/{action}/
          {country}/{*cities}",
    defaults: new { controller = "Home", 
              action = "GetData" }
);

Notice that the route pattern consists of four parameters namely controller, action, country and *cities. The *cities does the trick for us. This catch-all parameter indicates that any number of route segments can follow the country segment. Also notice that the route is configured to be handled by the GetData() action of the HomeController. The catch-all parameter must appear as the last segment of a route.

The GetData() action looks like this:

public ActionResult GetData(string country,string cities)
{
    string[] cityArray = cities.Split('/');

    ViewBag.Country = country;
    ViewBag.Cities = cityArray;

    return View();
}

The GetData() action takes two parameters - country and cities. Note that names of these parameters must match with the names of the route parameters defined in the RouteConfig.cs.

Capturing and using the country parameter is quite straightforward. The cities parameter could be a single city or multiple cities in the form city1/city2/city3. So, you need to split this string to get an array. Once you do that you are free to process the country and city values as per the application's logic. In this case you simply pass them to the GetData view through the ViewBag.

The Index view looks like this:

<body>
 <h1>
 <a href="/home/getdata/USA/Chicago">USA - Chicago</a>
 </h1>
 <h1>
 <a href="/home/getdata/USA/Chicago/Houston">
    USA - Chicago and Houston
 </a>
 </h1>
 <h1>
 <a href="/home/getdata/USA/Seattle/Boston/Tampa">
    USA - Seattle, Boston and Tampa
 </a>
 </h1>
</body>

The Index view simply renders a few links with USA as the country and some combination of cities.

The GetData view is shown below:

<body>
    <h1>@ViewBag.Country</h1>
    @foreach(string city in ViewBag.Cities)
    {
        <h2>@city</h2>
    }
</body>

The GetData view simply displays the country received in the controller and also a list of cities received from the route segments.

The following figure shows a sample run of the application.

image

Notice how the URL segments and the output of the view shows the country and cities.

That's it! Keep coding !!

READ MORE

Showing a single record for editing is quite common and the default model binding of ASP.NET MVC takes care of mapping the form fields to the model properties. However, sometimes you need to edit multiple records. For example, you may want to display an editable grid to the end user filled with existing data. The user can edit the values from multiple rows and hit Save in an attempt to save the data. In this case multiple model objects are being submitted to the action method. The single record editing works on the assumption that form field names from the view match the corresponding model property names. However, when multiple model objects are submitted this assumption is no longer valid. Luckily, by tweaking the form field names you can get this to work as expected. Let's see how.

Begin by creating a new ASP.NET MVC Application. Then right click on the Models folder and add an ADO.NET entity framework data model to it. Configure the model to use Customers table of the Northwind database. The following figure shows this model:

image

Then add HomeController in the Controllers folder. Modify the default Index() action method as shown below:

public ActionResult Index()
{
  NorthwindEntities db=new NorthwindEntities();
  var query = from c in db.Customers
              where c.Country=="UK"
              orderby c.CustomerID
              select c;
  return View(query.ToList());
}

The Index() action method simply selects all the customers from UK and passes them to the Index view as a List of Customer entities.

Then right click on the Index() action method and add Index view. The Index view is where you need to follow certain naming convention to get the desired results:

@model List<ModelBindingToListDemo.Models.Customer>
...
    <h1>List of Customers</h1>
    @using (Html.BeginForm("Index", "Home", FormMethod.Post))
    {
        <table border="1" cellpadding="6">
            @for (int i = 0; i < Model.Count;i++ )
            { 
                <tr>
                    <td>@Html.TextBox("customers[" + @i + "].CustomerID", 
                                      Model[i].CustomerID, 
                                      new { @readonly = "readonly" })</td>
                    <td>@Html.TextBox("customers[" + @i + "].CompanyName", 
                                      Model[i].CompanyName)</td>
                    <td>@Html.TextBox("customers[" + @i + "].ContactName", 
                                      Model[i].ContactName)</td>
                    <td>@Html.TextBox("customers[" + @i + "].Country", 
                                      Model[i].Country)</td>
                </tr>
            }
            <tr>
                <td colspan="4">
                    <input type="submit" value="Submit" />
                </td>
            </tr>
        </table>
    }
...

Notice the markup shown in the bold letters. The code is basically generating names for the textboxes matching the following convention:

customers[n].<Model_Property_Name>

Where n is an index starting from 0 and Model_Property_Name is the name of the properties such as CustomerID, CompanyName, ContactName and Country. For the sake of simplicity the above code uses only four properties form the Customer model class. So, all the textboxes having same index are considered as "one record". This naming convention is required to successfully bind data to the model as you will see later.

The following figures shows how the view looks like in the browser:

image

To see how the textbox names are being generated view the HTML source in the browser.

The above <form> submits the data to Index() method using post method. To handle this data write the second version of Index() action method as follows:

[HttpPost]
public ActionResult Index(List<Customer> customers)
{
  NorthwindEntities db=new NorthwindEntities();
  foreach (Customer cust in customers)
  {
    Customer existing = db.Customers.Find(cust.CustomerID);
    existing.CompanyName = cust.CompanyName;
    existing.ContactName = cust.ContactName;
    existing.Country = cust.Country;
  }
  db.SaveChanges();
  return View();
}

The overloaded Index() method takes a parameter - List of Customer entities. Recollect that this parameter name - customers - is what you used in the view markup earlier. Due the naming conventions followed the model binding framework of ASP.NET MVC transforms the form field values into a generic List of Customer objects. Once received you simply iterate through the List and modify the existing Customer with the new one. You can also put some logic to detect whether a record was really changed or not. Once all the rows are modified SaveChanges() is called to save the changes.

As mentioned earlier the naming convention requires that the index start at 0 and then sequentially increment for each record. If you try changing the start index to say 10, the model binding will fail to bind the data. What if you don't want to start the index from 0? For example, imagine a case where you are removing some row using client side script. In such cases the there might be "gaps" in between various index values. To overcome this situation you can follow an alternate naming convention:

@using (Html.BeginForm("Index", "Home", FormMethod.Post))
{
  <table border="1" cellpadding="6">
  @for (int i = 0; i < Model.Count;i++ )
  { 
    <tr>
      <td>
      @Html.Hidden("customers.Index", (@i + 10))
      @Html.TextBox("customers[" + (@i + 10) + "].CustomerID", 
                    Model[i].CustomerID, new { @readonly = "readonly" })
      </td>
      <td>@Html.TextBox("customers[" + (@i + 10) + "].CompanyName", 
                        Model[i].CompanyName)</td>
      <td>@Html.TextBox("customers[" + (@i + 10) + "].ContactName", 
                        Model[i].ContactName)</td>
      <td>@Html.TextBox("customers[" + (@i + 10) + "].Country", 
                        Model[i].Country)</td>
    </tr>
  }
<tr>
...
}

Notice the above markup carefully. Each table row now has a hidden form field. The name of the hidden form field is customers.Index and its value is set to some arbitrary index (i + 10 in this case). Then all the textboxes are assigned names of the form:

 customers[<arbitrary_index>].<model_property_name>

In this case all the textboxes having same index as specified by the hidden field are considered as "one record". In this case the index need not be a number. It can be a string also. Again, recollect that "customers" in the above markup is the name of the parameter of the Index() method.

That's it! Run the application and test if it works as expected.

READ MORE
...