top button
Flag Notify
    Connect to us
      Site Registration

Site Registration

Working With Collections in XAML?

+3 votes
392 views

Introduction

XAML provides UI element objects that can host child collection items. XAML also provides support to work with .NET collection types as data sources.

XAML Collections

A collection element usually is a parent control with child collection elements. The child collection elements are an ItemCollection that implements IList<object>. A ListBox element is a collection of ListBoxItem elements.

The code listing in Listing 1 creates a ListBox with a few ListBoxItems.


  1. <ListBox Margin="10,10,0,13" Name="listBox1" HorizontalAlignment="Left"  
  2. VerticalAlignment="Top" Width="194" Height="200">  
  3.   
  4. <ListBoxItem Content="Coffie"></ListBoxItem>  
  5. <ListBoxItem Content="Tea"></ListBoxItem>  
  6. <ListBoxItem Content="Orange Juice"></ListBoxItem>  
  7. <ListBoxItem Content="Milk"></ListBoxItem>  
  8. <ListBoxItem Content="Iced Tea"></ListBoxItem>  
  9. <ListBoxItem Content="Mango Shake"></ListBoxItem>  
  10.   
  11. </ListBox>  


Listing 1

The code listed above in Listing 1 generates Figure 1.

Figure 1

Add Collection Items

In the previous section, we saw how to add items to a ListBox at design-time from XAML. We can add items to a ListBox from the code.

Let's change our UI and add a TextBox and a button control to the page. See Listing 2.


  1. <TextBox Height="23" HorizontalAlignment="Left" Margin="8,14,0,0"  
  2. Name="textBox1" VerticalAlignment="Top" Width="127" />  
  3. <Button Height="23" Margin="140,14,0,0" Name="button1" VerticalAlignment="Top" HorizontalAlignment="Left" Width="76" Click="button1_Click">  
  4. Add Item  
  5. </Button>  


Listing 2

The final UI looks like Figure 2.

Figure 2.

We can access collection items using the Items property. On the button click event handler, we add the content of the TextBox to the ListBox by calling the ListBox.Items.Add method. The code in Listing 3 adds the TextBox content to the ListBox items.


  1. private void button1_Click(object sender, RoutedEventArgs e)  
  2. {  
  3. listBox1.Items.Add(textBox1.Text);  
  4. }  


Listing 3

Now if you enter text into the TextBox and click the Add Item button, it will add the contents of the TextBox to the ListBox. See Figure 3.

Figure 3

Delete Collection Items

We can use the ListBox.Items.Remove or ListBox.Items.RemoveAt method to delete an item from the collection of items in the ListBox. The RemoveAt method takes the index of the item in the collection.

Now, we modify our application and add a new button called Delete Item. The XAML code for this button looks as in the following.


  1. <Button Height="23" Margin="226,14,124,0" Name="DeleteButton"  
  2. VerticalAlignment="Top" Click="DeleteButton_Click">  
  3. Delete Item</Button>  


Listing 4

The button click event handler looks like the following. On this button click, we find the index of the selected item and call the ListBox.Items.RemoveAt method as in the following.


  1. private void DeleteButton_Click(object sender, RoutedEventArgs e)  
  2. {  
  3. listBox1.Items.RemoveAt  
  4. (listBox1.Items.IndexOf(listBox1.SelectedItem));  
  5. }  


Listing 5

Collection Types

XAML allows developers to access .NET class library collection types from the scripting language. The code snippet in the Listing creates an array of String types, a collection of strings. To use the Array and String types, we must import the System namespace.

The code listing in Listing 6 creates an Array of String objects in XAML. As you may noticed in Listing 2, you must import the System namespace in XAML using the xmlns.


  1. <Window x:Class="XamlCollectionsSample.MainWindow"  
  2. xmlns="http://schemas.microsoft.com/winfx/2006/xaml/presentation"  
  3. xmlns:x="http://schemas.microsoft.com/winfx/2006/xaml"  
  4. xmlns:sys="clr-namespace:System;assembly=mscorlib"  
  5. Title="MainWindow" Height="402.759" Width="633.345">  
  6.   
  7. <Window.Resources>  
  8. <x:Array x:Key="AuthorList" Type="{x:Type sys:String}">  
  9. <sys:String>Mahesh Chand</sys:String>  
  10. <sys:String>Praveen Kumar</sys:String>  
  11. <sys:String>Raj Beniwal</sys:String>  
  12. <sys:String>Neel Beniwal</sys:String>  
  13. <sys:String>Sam Hobbs</sys:String>  
  14. </x:Array>  
  15. </Window.Resources>  
  16.   
  17. </Window>  


Listing 6

The ItemsSource property if ListBox in XAML is used to bind the ArrayList. See Listing 7.


  1. <ListBox Name="lst" Margin="5" ItemsSource="{StaticResource AuthorList}" />  


Listing 7

Summary

XAML supports collections including collection items and working with .NET collection types. In this article, we saw how to create a control with collection items and how to access its items dynamically.

posted Mar 30, 2016 by Jdk

  Promote This Article
Facebook Share Button Twitter Share Button LinkedIn Share Button


Related Articles

The ScrollViewer is an object that represents a scrollable area that contains other visible controls, it could be found within the System.Windows.Controls.  At the contrast of a ScrollBar object, the ScrollViewer is a WPF new feature. So let's discover its principal characteristics through this article.

Imagine that you host an image in your application in such way that its dimensions are bigger than the window. You can make use of a ScrollViewer to enable see the entire image without having the obligation to change the dimension of the given window. Try to host a big image within a given window. Say that the image height and width are both 1000 pixels.

<Window x:Class="myWpfApplication.Window1"

    xmlns="http://schemas.microsoft.com/winfx/2006/xaml/presentation"

    xmlns:x="http://schemas.microsoft.com/winfx/2006/xaml"

    xmlns:wf="clr-namespace:System.Windows.Forms.Integration;assembly=WindowsFormsIntegration"

    Title="Window1" Height="300" Width="300" xmlns:my="clr-namespace:System.Windows.Forms.Integration;assembly=WindowsFormsIntegration"

      Loaded="Window_Loaded" >

            <Image Source="C:\myWpfApplication\myWpfApplication\image.BMP" Width="1000"Height="1000"></Image>


The result will be:

ScrollViewer1.gif
 
Figure 1

And even you expand the window. You couldn't get the entire image at the screen level. To prevent this problem you may use the ScrollViewer object as follow:

Replace the above XAML code by this one.


<Window x:Class="myWpfApplication.Window1"

    xmlns="http://schemas.microsoft.com/winfx/2006/xaml/presentation"

    xmlns:x="http://schemas.microsoft.com/winfx/2006/xaml"

    xmlns:wf="clr-namespace:System.Windows.Forms.Integration;assembly=WindowsFormsIntegration"

    Title="Window1" Height="300" Width="300" xmlns:my="clr-namespace:System.Windows.Forms.Integration;assembly=WindowsFormsIntegration"

      Loaded="Window_Loaded" >

    <Grid>

    <ScrollViewer VerticalScrollBarVisibility="Visible"

                   HorizontalScrollBarVisibility="Visible">

        <Image Source="C:\myWpfApplication\myWpfApplication\image.BMP" Width="1000"Height="1000"></Image>

    </ScrollViewer></Grid>

</Window>


And the result will be

ScrollViewer2.gif
 
Figure  2

Then it is possible to scroll the image.

READ MORE

The WPF Expander represents a control with an expanded view where the contents of the expanded area can be expanded or collapsed.

The following XAML code shows how to create an Expander control in WPF.

<Expander Name="ExpanderControl" Header="Click to Expand"   
          HorizontalAlignment="Left" >  
    <TextBlock TextWrapping="Wrap" FontSize="14" FontWeight="Light" Foreground="Black">  
        This is an Expander control. Within this control, all contents will be wrapped.  
        At run-time, you may expand or collapse this control. Type more text here to be typed.  
        Jump around and hype.   
    </TextBlock>  
</Expander> 

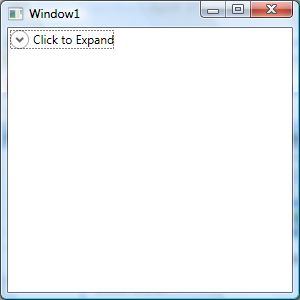
The default view of an Expander control looks like this.

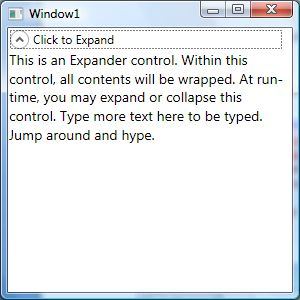
If you click on the header, the expanded view looks like this.


Most of the time, you would want the header of the Expander control to look different from the contents. This can be done by simply setting the font properties of the Expander control different from the contents.
 

This code sets the FontSize and FontWeight of the Expander control different from the contents of the Expander control. 

<Window x:Class="ExpanderControlSample.Window1"  
        xmlns="http://schemas.microsoft.com/winfx/2006/xaml/presentation"  
        xmlns:x="http://schemas.microsoft.com/winfx/2006/xaml"  
        Title="Window1" Height="300" Width="300">  
    <Grid>  
        <Expander Name="ExpanderControl" Background="LavenderBlush"   
          HorizontalAlignment="Left" Header="Click to Expand"   
          ExpandDirection="Down" IsExpanded="False" Width="200"  
                  FontSize="20" FontWeight="Bold" Foreground="Green">  
            <TextBlock TextWrapping="Wrap" >  
                This is an Expander control. Within this control, all contents will be wrapped.  
                At run-time, you may expand or collapse this control. Type more text here to be typed.  
                Jump around and hype.   
            </TextBlock>  
        </Expander>  
    </Grid>  
</Window> 

The new output looks like this. As you can see from this figure, the header of the Expander control is different from the contents.


How to create an Expander control dynamically

The Expander class in WPF represents an Expander control.

This code snippet creates an Expander control at run-time.

private void CreateDynamicExpander()  
{  
   Expander dynamicExpander = new Expander();  
   dynamicExpander.Header = "Dynamic Expander";  
   dynamicExpander.HorizontalAlignment = HorizontalAlignment.Left;  
   dynamicExpander.Background = new SolidColorBrush(Colors.Lavender);  
   dynamicExpander.Width = 250;  
   dynamicExpander.IsExpanded = false;  
   dynamicExpander.Content = "This is a dynamic expander";  
  
   RootGrid.Children.Add(dynamicExpander);  

How to set the direction of an Expander Control
 

The ExpandDirection property of the Expander control sets the direction of the Header. It can be Up, Down, Left or Right. The following code snippet sets the ExpandDirection to Up.

<Expander Name="ExpanderControl" Background="LavenderBlush"   
          HorizontalAlignment="Left" Header="Click to Expand"   
          ExpandDirection="Up" IsExpanded="False" Width="200"  
                  FontSize="20" FontWeight="Bold" Foreground="Green">  
     <TextBlock TextWrapping="Wrap" >  
         This is an Expander control. Within this control, all contents will be wrapped.  
         At run-time, you may expand or collapse this control. Type more text here to be typed.  
         Jump around and hype.   
     </TextBlock>  
</Expander>

The control with Up direction looks like this.


How to set an image in an Expander Header

Expander.Header property may be used to style the header of an Expander control. Within the Header, you can set whatever contents you would like including an Image.
 

This code adds in image and text in the header of an Expander.

<Expander Name="ExpanderControl"   
  HorizontalAlignment="Left" Background="LavenderBlush"   
  ExpandDirection="Down"  IsExpanded="False" Width="250"  
          FontSize="20" FontWeight="Bold" Foreground="Green" >  
    <Expander.Header>  
        <BulletDecorator>  
            <BulletDecorator.Bullet>  
                <Image Width="50" Source="Flowers.jpg"/>  
            </BulletDecorator.Bullet>  
            <TextBlock Margin="20,0,0,0">Flower Header</TextBlock>  
        </BulletDecorator>  
    </Expander.Header>  
  
    <TextBlock TextWrapping="Wrap" FontSize="14" FontWeight="Light" Foreground="Black">  
        This is an Expander control. Within this control, all contents will be wrapped.  
        At run-time, you may expand or collapse this control. Type more text here to be typed.  
        Jump around and hype.   
    </TextBlock>  
</Expander>  

The control with an image header looks like this.


How to add scrolling to an Expander Control
 

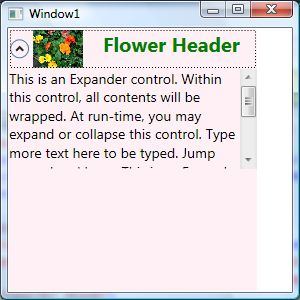
Adding a Scrollviewer control in the contents of an Expander adds scrolling to the Expander. This code adds scrolling to the contents of an Expander. 

<Expander Name="ExpanderControl"   
  HorizontalAlignment="Left" Background="LavenderBlush"   
  ExpandDirection="Down"  IsExpanded="False" Width="250"  
          FontSize="20" FontWeight="Bold" Foreground="Green" >  
    <Expander.Header>  
        <BulletDecorator>  
            <BulletDecorator.Bullet>  
                <Image Width="50" Source="Flowers.jpg"/>  
            </BulletDecorator.Bullet>  
            <TextBlock Margin="20,0,0,0">Flower Header</TextBlock>  
        </BulletDecorator>  
    </Expander.Header>  
    <Expander.Content>  
        <ScrollViewer Height="100" VerticalAlignment="Top" >  
            <TextBlock TextWrapping="Wrap" FontSize="14" FontWeight="Light" Foreground="Black">  
                This is an Expander control. Within this control, all contents will be wrapped.  
                At run-time, you may expand or collapse this control. Type more text here to be typed.  
                Jump around and hype. This is an Expander control. Within this control, all contents will be wrapped.  
                At run-time, you may expand or collapse this control. Type more text here to be typed.  
                Jump around and hype.  
            </TextBlock>  
        </ScrollViewer>  
    </Expander.Content>  
</Expander> 

The Expander control with a scroll viewer looks like this.
READ MORE

The WPF Frame control using XAML and C# supports content navigation within content. A Frame can be hosted within a WindowNavigationWindowPageUserControl, or a FlowDocument control.

How to create a Frame in WPF

This XAML code shows how to create a Frame control and sets its Source property to load a XAML page within it.

  1. <Window x:Class="FrameSample.Window1"  
  2.     xmlns="http://schemas.microsoft.com/winfx/2006/xaml/presentation"  
  3.     xmlns:x="http://schemas.microsoft.com/winfx/2006/xaml"  
  4.     Title="Window1" Height="300" Width="300">  
  5.     <Grid>          
  6.         <TextBlock>Outside area of frame</TextBlock>  
  7.         <Frame Source="Page1.xaml">              
  8.         </Frame>  
  9.     </Grid>  
  10. </Window>  

The Window looks like this. The Purple area is the Page1.xaml and the White area is outside of the frame.


Now you can manage the contents of a frame the way you want.

For example, the following code rotates the contents of the frame to a 45 degree angle.

  1. <Frame Source="Page1.xaml">  
  2.     <Frame.LayoutTransform>  
  3.         <RotateTransform Angle="45" />  
  4.     </Frame.LayoutTransform>  
  5. </Frame>  

The new output looks like this.


How to Navigate to a URI in a WPF Frame

The following code creates a Frame within a window and adds a button control to the window. On the button click event handler we will navigate to a URI using a Frame.

  1. <Window x:Class="FrameSample.Window1"  
  2.     xmlns="http://schemas.microsoft.com/winfx/2006/xaml/presentation"  
  3.     xmlns:x="http://schemas.microsoft.com/winfx/2006/xaml"  
  4.     Title="Window1" Height="300" Width="300">  
  5.     <Grid>  
  6.         <TextBlock>Outside area of frame</TextBlock>  
  7.         <Frame Name="FrameWithinGrid" >  
  8.         </Frame>  
  9.         <Button Height="23" Margin="114,12,25,0"   
  10.                 Name="button1" VerticalAlignment="Top" Click="button1_Click">Navigate to C# Corner  
  11.         </Button>  
  12.     </Grid>  
  13. </Window>  

The Navigate method of Frame is used to navigate to a URI. The following code navigates to Page1.xaml.

  1. private void button1_Click(object sender, RoutedEventArgs e)  
  2. {  
  3.     FrameWithinGrid.Navigate(new System.Uri("Page1.xaml",  
  4.              UriKind.RelativeOrAbsolute));  
  5. }  

The following code navigates to an external website URL and opens the ASPX page within a Frame.

  1. FrameWithinGrid.Source = new Uri("http://www.c-sharpcorner.com/Default.aspx", UriKind.Absolute);  

If you need to open a URI in a new browser window, the following code will do that. This code first creates a NavigationWindow and then sets its Source to a URI.

  1. NavigationWindow window = new NavigationWindow();  
  2. Uri source = new Uri("http://www.c-sharpcorner.com/Default.aspx", UriKind.Absolute);  
  3. window.Source = source; window.Show();  
READ MORE

XAML RepeatButton in WPF

XAML RepeatButton represents a set of repeat buttons. This article shows how to use a RepeatButton control in WPF using XAML and C#. 

Creating a RepeatButton

The RepeatButton XAML element represents a WPF RepeatButton control. 

  1. <Button/>  

The Width and Height attributes represent the width and the height of a RepeatButton. The Content property sets the text of the button. The Name attribute represents the name of the control, that is a unique identifier of a control. 

The code snippet in Listing 1 creates a Button control and sets its name, height, width and content. 


<RepeatButton Margin="10,10,0,0" VerticalAlignment="Top"   
   HorizontalAlignment="Left"   
   Name="GrowButton" Width="80" Height="30">  
</RepeatButton>  

Listing 1

The default property of a button is Content. The code snippet in Listing 2 creates the same button as created by Listing 1.

<RepeatButton Margin="10,10,0,0" VerticalAlignment="Top"   
   HorizontalAlignment="Left"   
   Name="GrowButton" Width="80" Height="30">  
   Grow  
</RepeatButton>  

Listing 2

The output looks as in Figure 1


Figure 1

Delay and Interval

The Delay and Interval properties make a RepeatButton different from a normal button. 

RepeatButton is a button that fires Click events repeatedly when it is pressed and held. The rate and aspects of repeating are determined by the Delay and Interval properties that the control exposes.

The code snippet in Listing 3 sets the Delay and Interval properties. 


<RepeatButton Margin="10,10,0,0" VerticalAlignment="Top"   
   HorizontalAlignment="Left"   
   Name="GrowButton" Width="80" Height="30"   
   Delay="500" Interval="100" >  
   Grow  
</RepeatButton>  

Listing 3

Adding a Button Click Event Handler

The Click attribute of a RepeatButton element adds the click event handler and it keeps firing the event for the given Interval and delay values. The code in Listing 4 adds the click event handler for a Button. 

<Button x:Name="DrawCircleButton" Height="40" Width="120"   
        Canvas.Left="10" Canvas.Top="10"   
        Content="Draw Circle"  
        VerticalAlignment="Top"   
        HorizontalAlignment="Left">  
Click="DrawCircleButton_Click"  
</Button>  

Listing 4

The code for the click event handler looks as in following. 

  1. private void GrowButton_Click(object sender, RoutedEventArgs e)  
  2. {  
  3. }  

Okay, now let's write a useful application. 

We will build an application with the two buttons Grow and Shrink and a rectangle. The application looks as in Figure 2.

When you click and continue pressing the Grow button, the width of the rectangle will continue to grow and when you click on the Shrink button, the width of the rectangle will shrink continuously. 


Figure 2

The final XAML code is listed in Listing 5

<Window x:Class="RepeatButtonSample.Window1"  
    xmlns="http://schemas.microsoft.com/winfx/2006/xaml/presentation"  
    xmlns:x="http://schemas.microsoft.com/winfx/2006/xaml"  
    Title="Window1" Height="300" Width="300">  
      
    <Grid Name="LayoutRoot">  
        <RepeatButton Margin="10,10,0,0" VerticalAlignment="Top"   
                      HorizontalAlignment="Left"                         
                      Name="GrowButton"  Width="80" Height="30"   
                      Delay="500" Interval="100"   
                      Click="GrowButton_Click">  
            Grow  
        </RepeatButton>  
        <RepeatButton Margin="100,10,0,0" VerticalAlignment="Top"   
                      HorizontalAlignment="Left"                         
                      Name="ShrinkButton"  Width="80" Height="30"   
                      Delay="500" Interval="100"   
                      Click="ShrinkButton_Click">  
            Shrink  
        </RepeatButton>  
          
        <Rectangle Name="Rect" Height="100" Width="100" Fill="Orange"/>  
  
    </Grid>  
</Window>  

Listing 5

Listing 6
 is the click event handlers for the buttons that change the width of the rectangle.

private void GrowButton_Click(object sender, RoutedEventArgs e)  
{  
    Rect.Width += 10;  
}  
  
private void ShrinkButton_Click(object sender, RoutedEventArgs e)  
{  
   

Listing 6

READ MORE

Data Binding

Data Binding is the process of taking some data and associating it to visual elements on user interface (UI).

Overview of Data Binding

We will take any object and with their properties present each instance of object in collection on screen to user in “Grid “like fashion. We get to create a little template of how each individual instance of object is represented in the user interface .The “ListView” is also same but it works in single column fashion.

Create a Project in Visual Studio 2015

In order to perform data binding , you need to create a project in Visual Studio 2015, steps are simple:

  1. Select “Universal” as shown by arrow.
  2. Select “Blank App” as shown in circle.
  3. Name your solution, for instance “BindDataExample“.

binddataexample

Designer Window

A designer window will open once you create the project with name”MainPage.xaml“. in this window there is a designer surface and you can also write your XAML code …now for instance we select our object a “Book” and in order to perform data binding simply create a user interface in XAML . The code is shown in the following image in rectangle sharpe.

Designer Window

Create Data Model

  1. Go to “Solution Explorer” shown by circle.
  2. Right click the “BindDataExample” shown by arrow.
  3. Add new folder, name it “Models” shown by circle.

Create Data Model

Create C# class in Models Folder

  1. Go to Models folder.
  2. Right click and select add new item.
  3. Select Class and name it “Book.cs“.

C# class

Book Class with Properties

Once you perform all the above mentioned tasks, there will be a c# class open for us and our object which in this case is a book, we can create its class and define its properties in that very C# class we have.

  1. Create a class “Book“.
  2. Define its properties.
  3. Copy the C# code in red rectangular box.

Book

Creating New Instances & Add in Collection

After you created your Book class and set its properties, now its time to create instances of your class and populate it into a collection, list of book. We will generate another class , name it “BookManager” in the same file, for this purpose. And then return the list to caller. The following code will help you out.

BookManager

Add GridView, Bind to data from BookManager Class

Our next step is after we created the instances, storing them in collection is to bind the data in GridView from that very class. For this we will return to our “MainPage.xaml” and create a template that how each individual item will appear on the screen. The template code is in red box . 

MainPage.xaml

Add XAML namespace

In order to reference the class in XAML, we need to reference its namespace in XAML. Here you go, shown by red arrow.

xaml namespace

Create Public Property in MainPage.xaml.cs

After we create the template, our next step will be to create a public property in “mainpage.xaml.cs “and populate it with Books.

  1. Add public property as shown in circular region.
  2. Make sure you add a namespace if it is not there as shown by arrow.
  3. Initialize it with “Books=BookManager.GetBooks();.”, this will return list of books.

public property

Run your Application.

After completion of all the steps, run you application and the final result will be shown something like the following,

bind your application

Working on Alignment

You can change the alignment and margin again. Here's a simple step to do,

Alignment

Overview

In nutshell, the alignment will make display much better.

READ MORE

In this article you will learn how to create and use a CustomResource in XAML.


  1. Open a new Visual C# windows project.
     
  2. Add a new class named say CustomResourceTest.cs in the project folder.

    CustomResourceTest.cs
     
  3. Derive this class from CustomXamlResourceLoader Class(Case sensitive) like below:

    CustomXamlResourceLoader Class
     
  4. You will get a Namespace not found error. Resolve it by using Windows.UI.Xaml.Resources Namespace.

    Windows.UI.Xaml.Resources
     
  5. Override the GetResource Member of the parent class as below. Use the intellisense to select the member.

    getresource

    getresource1
     
  6. Replace the Code inside the GetResource Method as: (this is just a simple example). We are returning a text. We plan to show this text inside a TextBlock’s Text Property.

    TextBlock
     
  7. Inside the MainPage.cs . Add the following line of code inside the MainPage Constructor to reference the CustomResouceTest.cs Class from the Page’s XAML.

    MainPage

    Correct the NameSpace not found error by resolving it.
     
  8. Now go to the MainPage.xaml Page and Add a TextBlock as follows. Notice the Text property of the TextBlock.

    MainPage.xaml
     
  9. This results in the following output when you save, build and run the project.

    run
     
  10. What is happening here?
     
    • We created a CustomResourceClass where we inherited the Class called CustomXamlResourceLoader.
    • We override the GetResourceProperty. Don’t focus on the parameters of this method for now.
    • We replaced the code inside this method by simply returning a text.
    • To access this CustomResource from XAML we have to define the CustomXamlResourceLoader. Current property to the new instance of the Class we created. We have to do this inside the Constructor of the Codebehind page where we want to use the CustomResource.
    • We then simply assigned the value of the Text property of the textblock to the CustomResource as seen on Step 8.

Example 2:

  1. Now we will try a different example where we want to display the Text of the TextBlock based on the value we pass on. Change the text of the Mainpage.xaml as:

    Mainpage.xaml 2
     
  2. The 'sayHello' string is passed as a string to the CusomResourceTest.cs class as ResourceID parameter of the overridden class. This will be more clear as you see in the next step.
     
  3. In the CustomResourceTest.cs class , change the code as follows:

    CustomResourceTest.cs2
     
  4. The thing to understand is how we pass the ResourceID from the Text Property of the TextBlock. It is passed as the resourceID parameter. So, based on the ResourceID, we return the appropriate text we want to display on the output screen.
     
  5. So now we get output as.
  6. If we change the text property as sayByeBye.

    sayByeBye
     
  7. We get the following output:
     
READ MORE

it's about separating data from layout. So, let's try binding some data to a ListView:

using System;
using System.Collections.Generic;
using System.Windows;

namespace WpfTutorialSamples.ListView_control
{
        public partial class ListViewDataBindingSample : Window
        {
                public ListViewDataBindingSample()
                {
                        InitializeComponent();
                        List<User> items = new List<User>();
                        items.Add(new User() { Name = "John Doe", Age = 42 });
                        items.Add(new User() { Name = "Jane Doe", Age = 39 });
                        items.Add(new User() { Name = "Sammy Doe", Age = 13 });
                        lvDataBinding.ItemsSource = items;
                }
        }

        public class User
        {
                public string Name { get; set; }

                public int Age { get; set; }
        }
}

We populate a list of our own User objects, each user having a name and an age. The data binding process happens automatically as soon as we assign the list to the ItemsSource property of the ListView, but the result is a bit discouraging:

A simple ListView control, using data binding

Each user is represented by their type name in the ListView. This is to be expected, because .NET doesn't have a clue about how you want your data to be displayed, so it just calls the ToString() method on each object and uses that to represent the item.

We can use that to our advantage and override the ToString() method, to get a more meaningful output. Try replacing the User class with this version:

public class User
{
        public string Name { get; set; }

        public int Age { get; set; }

        public override string ToString()
        {
                return this.Name + ", " + this.Age + " years old";
        }
}

A simple ListView control, using data binding and a ToString method on the source object

This is a much more user friendly display and will do just fine in some cases, but relying on a simple string is not that flexible. Perhaps you want a part of the text to be bold or another color? Perhaps you want an image? Fortunately, WPF makes all of this very simple using templates.

ListView with an ItemTemplate

WPF is all about templating, so specifying a data template for the ListView is very easy. In this example, we'll do a bunch of custom formatting in each item, just to show you how flexible this makes the WPF ListView.

Download sample

<Window x:Class="WpfTutorialSamples.ListView_control.ListViewItemTemplateSample"
        xmlns="http://schemas.microsoft.com/winfx/2006/xaml/presentation"
        xmlns:x="http://schemas.microsoft.com/winfx/2006/xaml"
        Title="ListViewItemTemplateSample" Height="150" Width="350">
    <Grid>
                <ListView Margin="10" Name="lvDataBinding">
                        <ListView.ItemTemplate>
                                <DataTemplate>
                                        <WrapPanel>
                                                <TextBlock Text="Name: " />
                                                <TextBlock Text="{Binding Name}" FontWeight="Bold" />
                                                <TextBlock Text=", " />
                                                <TextBlock Text="Age: " />
                                                <TextBlock Text="{Binding Age}" FontWeight="Bold" />
                                                <TextBlock Text=" (" />
                                                <TextBlock Text="{Binding Mail}" TextDecorations="Underline" Foreground="Blue" Cursor="Hand" />
                                                <TextBlock Text=")" />
                                        </WrapPanel>
                                </DataTemplate>
                        </ListView.ItemTemplate>
                </ListView>
        </Grid>
</Window>


READ MORE
...