Many web applications developed today use some or the other JavaScript library or framework. These libraries and frameworks heavily rely on what is known as JavaScript prototypes. Therefore, it would be interesting to any web developer to understand this concept. This short article explains in brief what JavaScript prototypes are and how they form an integral part of many of the popular JavaScript libraries.
It may sound bit confusing, but a JavaScript function is actually an object and it gets a few prebuilt properties. One of these properties is the prototype property. The prototype property (often referred to as a function prototype) allows you to add properties and methods to the function under consideration. (Remember what was just mentioned: functions are objects and hence can have properties and methods!)
Here’s an example that makes it clear:
function Customer() {
  this.customerID = 0;
  this.companyName = '';
  this.contactName = '';
  this.country = '';
};
The code declares a function named Customer. The Customer function declares four members - customerID, companyName, contactName and country - intended to store customer ID, company's name, contact person and country, respectively. Once created, you can instantiate and use Customer like this:
var objCust1 = new Customer();
objCust1.customerID = 1;
objCust1.companyName = 'some company name';
objCust1.contactName = 'some contact name';
objCust1.country = 'USA';
alert('#' + objCust1.customerID + ' ' + objCust1.companyName);
This code creates an instance of Customer and stores it in an objCust1 variable. When you instantiate an Customer, its members assume the values as assigned in the Customer() function. This is analogous to a constructor in C#. The code then assigns customerID, companyName, contactName and country members of Customer. Finally, values of a few members are displayed using an alert dialog. You can add more members to Customer by using its prototype property as illustrated here:
Customer.prototype.customerSince = null;
Customer.prototype.getOrderDetails = function () {
  //return order details here
  return "This customer has total 10 orders worth Rs. 1,00,000.";
};
The code accesses the prototype property of the Customer object and adds a customerSince member to store the date since a company is your customer. Then the code defines the getOrderDetails() method on the Customer object. The getOrderDetails() method is supposed to return some details about all the orders of a customer.
Once you add the properties and methods to the function prototype, you can instantiate and use the Customer object as follows:
var objCust2 = new Customer();
objCust2.customerID = 2;
objCust2.companyName = 'company 2';
objCust2.contactName = 'contact 2';
objCust2.country = 'IN';
objCust2.customerSince = new Date(1992, 8, 14);
var orderDetails = objCust2.getOrderDetails();
alert(objCust2.companytName + ' - ' + objCust2.customerSince + " - " + orderDetails);
This code created an object named objCust2 that is of type Customer. The code then sets properties of Customer including the newly defined customerSince and calls its getOrderDetails() method. The values are displayed back in an alert dialog.
Now, let's put this concept to use. We will build our own $ library on the lines of jQuery. Obviously, we are not going to build any rich functionality like jQuery. What our library will do is simply select a specific DOM element and make its contents appear bold, italics or underlined depending upon our instructions. The idea is to show how JavaScript prototypes are used by these popular libraries and how you too can use them in your applications. Let's get going.
Create a new web site in your favorite editor (I used Visual Studio) and add Scripts folder to it. Then add a new JavaScript file and name it MyJavaScriptLibrary.
At the top of this file define our precious gen - the $ - as shown below:
var $ = null;
JavaScript allows you create variable whose name is $. Now you must have got some hint about jQuery $ usage. Currently our $ object won't do anything because it points to null. Later we will point this $ variable to a function.
Then add the following code that creates a function named MyJavaScriptLibrary:
var MyJavaScriptLibrary = function () {
    this.targetElement = null;
}
The MyJavaScriptLibrary function (keep in mind function is an object!) defines two members targetElement and fn. The targetElement member is intended to hold a reference to a DOM element that is to be manipulated with our library.
Now, it's time to define a few functions for MyJavaScriptLibrary that will do some meaningful work. These functions are added to MyJavaScriptLibrary using its prototype object. Here is how:
MyJavaScriptLibrary.prototype.Init = function (id) {
    this.targetElement = document.getElementById(id);
}

MyJavaScriptLibrary.prototype.MakeBold = function () {
    this.targetElement.innerHTML = "<strong>" + this.targetElement.innerHTML + "</strong>";
}

MyJavaScriptLibrary.prototype.MakeItalic = function () {
    this.targetElement.innerHTML = "<em>" + this.targetElement.innerHTML + "</em>";
}
As you can see we added three functions - Init(), MakeBold() and MakeItalic() - to the prototype object. The Init() function accepts a DOM element ID and grabs that element using document.getElementById() method. The grabbed element reference is then stored inside the targetElement property we declared earlier. The MakeBold() and MakeItalic() methods simply wrap the HTML contents of the target element inside <strong></strong> and <em></em> tags respectively. This way the contents of the element will appear bold or italics.
At this stage our library is in usable state. If you wish to go ahead and test its functionality you can add a reference to MyJavaScriptLibrary.js in some HTML page and write the following code in the HTML file:
<script type="text/javascript">
var obj = new MyJavaScriptLibrary();
obj.Init("div1");
obj.MakeBold();
obj.MakeItalic();
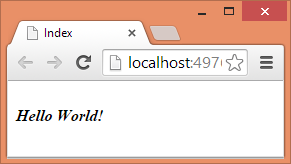
</script>The above code assumes that there is a <div> with ID of div1 on the page above the script block. It then creates an instance of MyJavaScriptLibrary() and calls Init() method to grab the <div> for applying the effects. Then MakeBold() and MakeItalic() methods are called on the obj to make the contents of <div> appear in bold and italics. The following figure shows that our library indeed works as expected.
Although our library is ready it's not yet a $ library. Let's add that piece of code in the MyJavaScriptLibrary.js file.
Add the following function at the end of the code we wrote so far in the MyJavaScriptLibrary.js file.
var Wrapper = function (id) {
    Wrapper.prototype = MyJavaScriptLibrary.prototype;
    Wrapper.fn = MyJavaScriptLibrary.prototype;
    var obj = new MyJavaScriptLibrary();
    obj.Init(id);
    return obj;
}
The above code creates a function named Wrapper. As the name suggests this function simply wraps the MyJavaScriptLibrary function. It accepts id of a DOM element as a parameter.
Inside, prototype property of Wrapper function is set to the prototype property of the MyJavaScriptLibrary function. Why is this needed? That's because we want to allow for extending MyJavaScriptLibrary. This calls for access to the prototype of MyJavaScriptLibrary. By pointing prototype of Wrapper to the prototype of MyJavaScriptLibrary we ensure that such an access can be provided. We also create a shortcut to the prototype in the form of fn property. This is just to mimic what jQuery library's provides. If you worked with jQuery, you might be aware that jQuery plugins are added to the $.fn oject.
The code then creates a new object of MyJavaScriptLibrary function and calls its Init() method by passing the ID to it. Notice that Wrapper() function returns obj back to the caller.
Now the final step - add $ alias to our library. Here is how that is done:
$ = Wrapper;
The second line of code points the $ variable we declared at the top to the Wrapper function. That's it! You just developed your own $ library!!
Let's use our $ library in an HTML page.
$("div1").MakeBold();

$.fn.MakeUnderlined = function () {
    this.targetElement.innerHTML = "<u>" + this.targetElement.innerHTML + "</u>";
}
$("div1").MakeItalic();
$("div1").MakeUnderlined();
The above code now uses $ everywhere instead of actual function names. Remember that $ means Wrapper. So, it is basically calling Wrapper function and passes ID of the <div> to it. This is our "selector" to grab the DOM element. Remember that Wrapper return an object of MyJavaScriptLibrary and hence functions such as MakeBold() can be invoked after $("...").
Next, the code extends our $ library by adding a custom function - MakeUnderlined() - to the $.fn object. Recollect that $ is Wrapper and fn is a reference to Wrapper's prototype.
Finally, the code calls MakeItalic() and MakeUnderlined() functions. The following figure shows a sample run of the page.
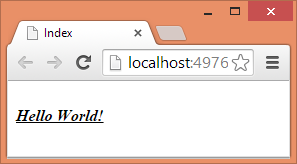
As you can see the text is displayed in bold, italics and underlined styles.
I hope you got an idea of what JavaScript prototypes are. Our example is too simplistic as compared to full-fledged libraries such as jQuery but it does explains the basic understanding as to how prototype object can be used to extend a function by adding your own properties and methods to it.

