If you are tracking the progress of ASP.NET 5, you are probably aware that RC 1 of ASP.NET 5 is now available. Although MVC 5.x is not going away anytime soon, it's good time to get a feel of how MVC 6 application development is going to be. To that end this article explains how a simple MVC 6 application can be developed from ground up using an Empty Project Template. This article is based on the following software:
- Visual Studio 2015
- ASP.NET 5 RC 1
- Entity Framework 7 RC 1
So, make sure you have them installed correctly before you proceed any further.
Let's begin!
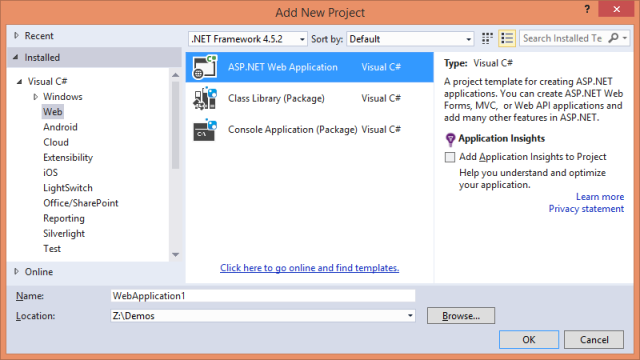
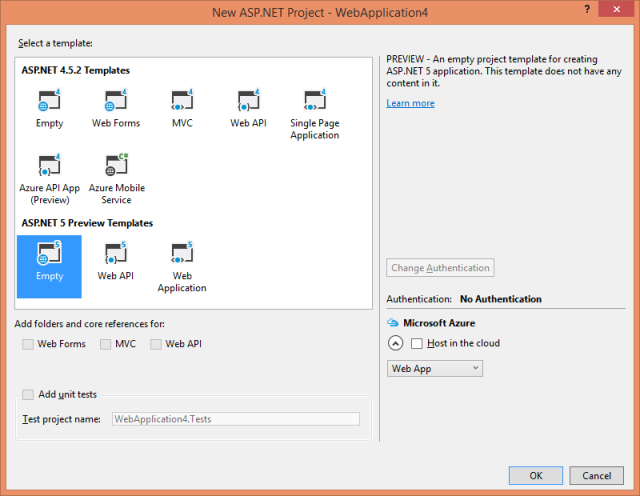
Open Visual Studio 2015 and select File > New > Project menu option. In the New Project dialog select ASP.NET Web Application, give some project name and click OK button.
In the project template dialog, select Empty under ASP.NET 5 Preview Templates section.
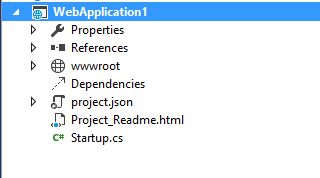
The newly created project looks like this in the Solution Explorer:
Now, open Project.json file in the Visual Studio editor. The Project.json file is a JSON file and contains all the project configuration such as project dependencies, target frameworks and more. For this example, you need to add certain NuGet packages required to develop and run the application. You can add project dependencies in two ways:
- Right click on the References node and select Manage NuGet Packages. This is quite similar to MVC 5.x projects. Once added the NuGet package entries are automatically added to the Project.json file.
- Add NuGet package dependencies directly in the Project.json file.
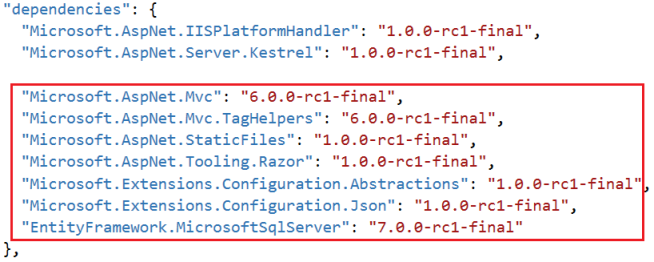
Let's use the later approach. Modify the dependencies section of Project.json as shown below:
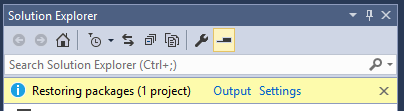
Add the project dependencies as shown above and save the Project.json file. At this point Visual Studio automatically installs the dependencies (downloading from NuGet, if necessary) for you. Look for the message like this that confirms this process:
We won't go into the details of each and every package in this article. It is suffice to mention that:
- Microsoft.AspNet.Mvc is the core MVC 6 package
- Microsoft.AspNet.Mvc.TagHelpers contains tag helpers (discussed later)
- EntityFramework.MicrosoftSqlServer provides Entity Framework 7 support
Next, right click on the project and select Add > New Item to open the Add New Item dialog.
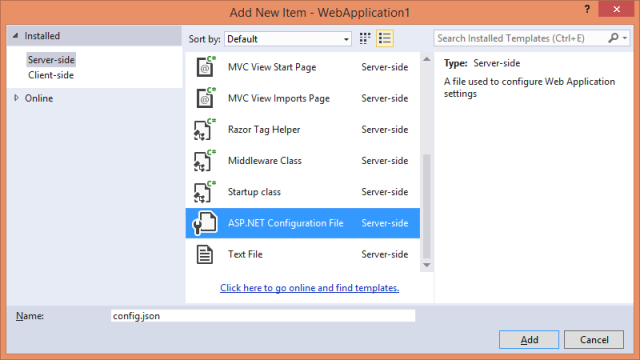
Select ASP.NET Configuration File from the list, name it AppSettings.json and click on Add to add the file to project root folder.
The AppSettings.json file contains all the application specific configuration (no more web.config). Remember the difference between Project.json and AppSettings.json. The former file stores project configuration that is necessary to compile and run the project. The later stores application configuration utilized in the code (connection strings, application settings and so on).
Change the default JSON markup from AppSettings.json to the following:
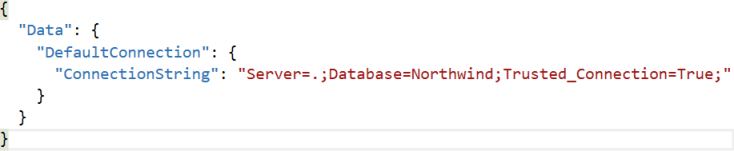
As you might have guessed, we stored database connection string for the Northwind database under Data:DefaultConnection:ConnectionString key.
Now add four folders under the project root namely Models, Views, Controllers and Classes. The purpose of the first three folders is quite obvious. The Classes folder will be used for storing other classes needed in the application such as a DbContext class. You are free to give any other name to this folder (or you may even isolate them in a Class Library).
Then add a class called AppSettings in the Classes folder and write the following code in it:
public class AppSettings
{
    public static string ConnectionString { get; set; }
}
The AppSettings class contains a single static property - ConnectionString - that is intended to hold the database connection string. This property is assigned from the Startup class as discussed shortly. Once assigned you can access the database connection string from anywhere in the application.
Now open Startup.cs file. The code from the Startup class is invoked whenever the application runs. You will find that the Startup class consists of two methods - ConfigureServices() and Configure(). Both of them have special meaning to the framework and hence their name must be kept unchanged.
Modify the Startup file to include a few namespaces and a public constructor.
...
...
using Microsoft.AspNet.Hosting;
using Microsoft.Dnx.Runtime;
using Microsoft.Extensions.Configuration;
using Microsoft.Extensions.PlatformAbstractions;
using Microsoft.Data.Entity;
using MVC6Demo.Classes;

namespace WebApplication1
{
    public class Startup
    {
        public Startup(IHostingEnvironment env,
               IApplicationEnvironment app)
        {
        }

        public void ConfigureServices(IServiceCollection services)
        {
        }

        public void Configure(IApplicationBuilder app)
        {
        }
    }
}
Notice the namespaces at the top. They are required by the code that you will fill in these methods shortly. Also notice that the constructor accepts two parameters - IHostingEnvironment and IApplicationEnvironment. These three methods are executed by the framework in the same order - Startup(), ConfigureServices() and Configure().
Next, add the following code to the Startup() constructor.
public Startup(IHostingEnvironment env,
               IApplicationEnvironment app)
{
    ConfigurationBuilder builder = new ConfigurationBuilder();
    builder.SetBasePath(app.ApplicationBasePath);
    builder.AddJsonFile("appsettings.json");
    IConfigurationRoot config = builder.Build();
    AppSettings.ConnectionString = config.Get<string>
           ("Data:DefaultConnection:ConnectionString");
}
The Startup constructor basically reads the AppSettings.json file and stores the database connection string into the AppSettings class. The ConfigurationBuilder class is responsible for reading and loading the configuration information. The SetBasePath() method sets the base path where the configuration file(s) is located. The ApplicationBasePath means the physical path of the project's root folder.
The AddJsonFile() adds AppSettings.json file to the list of configuration files to be processed. You can have multiple configuration files per project. The Build() method reads the configuration and returns it as an instance of IConfigurationRoot.
To read the configuration settings, you can use Get<T>() method on the IConfigurationRoot object. Notice how the setting to be read is specified using the : notation. Now the database connection string can be accessed from anywhere in the application in typed manner (and without reloading the config files).
Then modify the ConfigureServices() method as shown below:
public void ConfigureServices(IServiceCollection services)
{
    services.AddMvc();
    services.AddEntityFramework().AddSqlServer();
}
The ConfigureServices() method specifies the features that are available to your application. In this case your application is made available the services of the MVC framework and the Entity Framework.
Now modify the Configure() method as shown below:
public void Configure(IApplicationBuilder app)
{
    app.UseStaticFiles();
    app.UseMvc(routes =>
    {
        routes.MapRoute(
            name: "default",
            template: "{controller=Home}/{action=Index}/{id?}");
    });
}
The Configure() method tells the framework that you want to use static files feature and MVC features. The static files feature allows you to access static files such as .htm and .html. If you don't specify this feature and attempt to access the static files you will get an error. Of course, if you don't need this feature you can skip this line.
The UseMvc() call is important because it not only tells the framework that your application is using MVC but also configures the routing system.
Ok. Now add HomeController to the Controllers folder using the Add New Item dialog. The default HomeController looks like this:
public class HomeController : Controller
{
    public IActionResult Index()
    {
        ViewBag.Message = "Hello from MVC 6!";
        return View();
    }
}
Notice that the Index() action returns IActionResult. The Index() action is quite straightforward and simply sets Message property on the ViewBag.
Then add Home subfolder under Views folder. Right click on the Home folder and open the Add New Item dialog again to add Index view to the project.
Add the following HTML markup to the Index view.
<html>
<head>
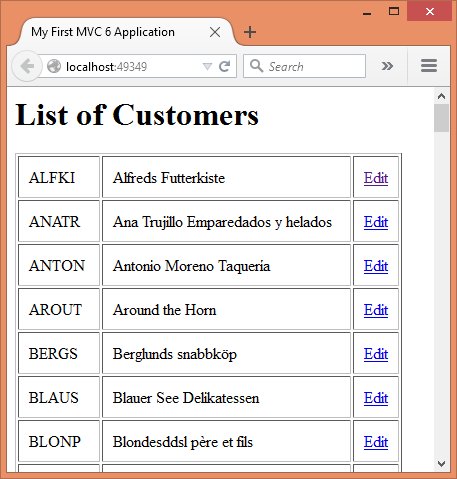
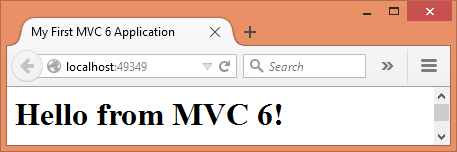
<title>My First MVC 6 Application</title>
</head>
<body>
<h1>@ViewBag.Message</h1>
</body>
</html>The Index view simply outputs the Message ViewBag property on the response stream.
Run the application by pressing F5. Your browser should look like this:
Although our application is working as expected we didn't use AppSettings class and Entity Framework features. The second part of this article discusses those details. Till then keep coding!